I don’t mind our cold Ontario winters, in fact, I try pretty hard not to complain about freezing my buns off. This gives me the right to complain bitterly about the absurd heat and humidity we’ve had the past few summers – I can always add more layers of clothing to fight off -30°C, but I can only remove so many layers to combat +30°C before I start getting arrested.
What does get me down in the winter months is our overall lack of sunlight, and the dreary, overcast, chromatically-challenged days are more trying than a frozen beard.
To combat this colour shortage, I seek out richly saturated photographic subjects – blobs of paint, yummy peanut M&M’s, crayons, paint chips, or ice.
That’s right. Ice.
A birefringent material does spooky things to polarized light.
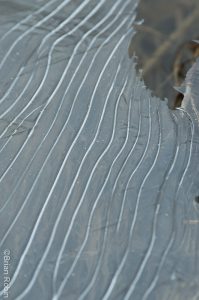
Specifically, I’m looking for thin ice, the kind you find on the edges of slow moving rivers, or streams, or on top of puddles after a cold evening. The kind of literal thin ice you want to avoid skating on (that figurative thin ice can evoke colourful language, but that’s another topic…). It’s typically pretty colourless, it can form in patterns that are interesting on their own, but the fact that it’s thin and ice means there’s a hidden world of colour waiting to happen.
Ice is a birefringent material. Birefringence is a big, sciencey word that essentially means “ice does spooky things to polarized light”.
To take advantage of this property, we need a few things:
- A thin piece of ice, e.g. taken from the edge of a river (don’t fall in).
- A polarized light source behind the ice, e.g. a tablet or lcd monitor.
- A polarizer filter on your camera.
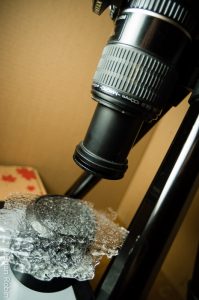
My basic setup is shown on the left, you can click it for a larger version. The tablet is showing a blank, white page. My piece of ice is raised off the tablet by a lens hood – this keeps the pixels of the screen from being in focus, keeps the ice away from the heat generated by the tablet and lets the ice be backlit by the tablet. My camera is armed with a macro lens so I can focus nice and close, and there’s a polarizing filter on the lens. A tripod is recommended, exposures are often in the 1/2 second or longer range.
It’s also best to work in a cold room, it’s ice and ice melts!
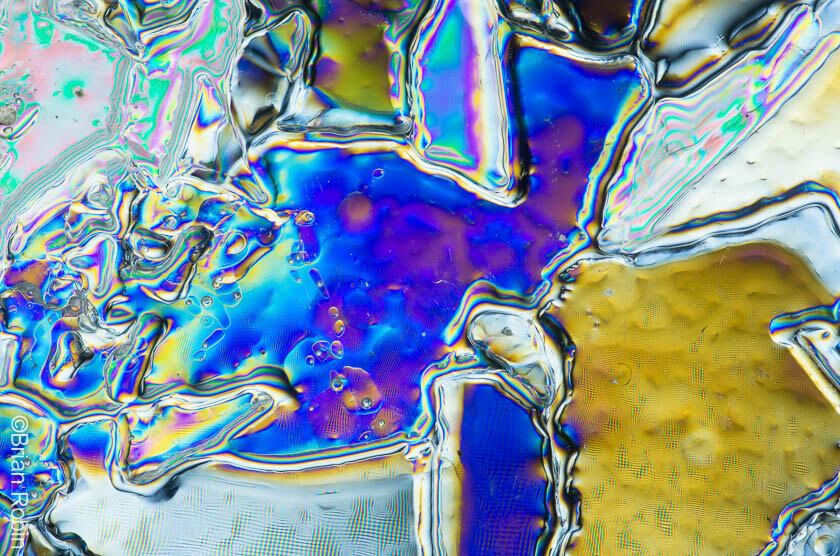
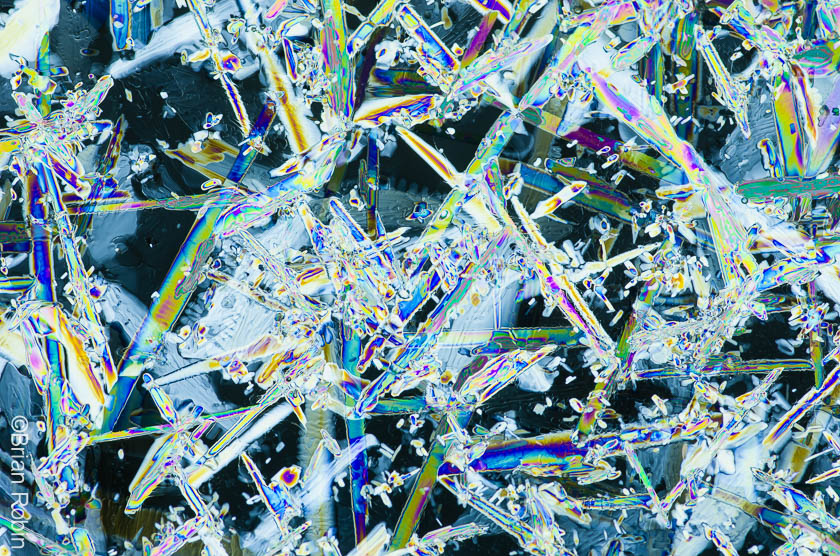
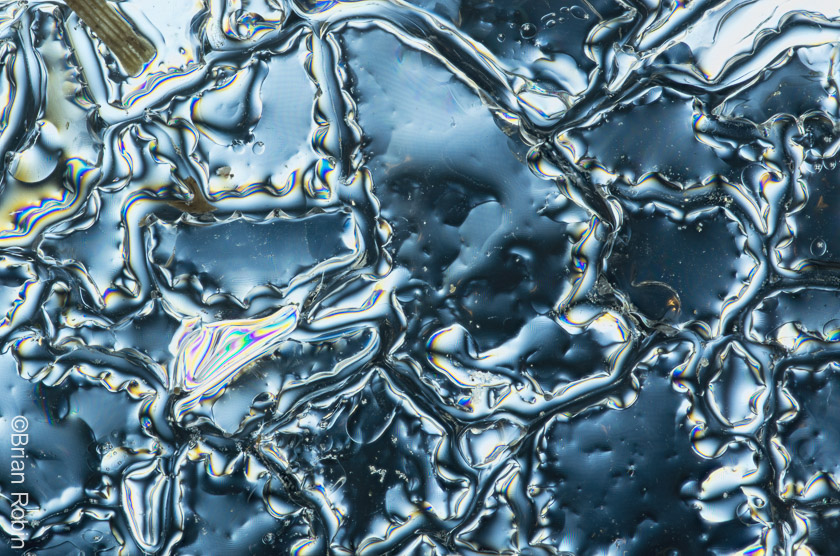
On another day, I may delve into the science of why this brings out funky colours, but for now (if you want to reproduce this at home) it’s enough to know that a birefringent material between two polarizers can be simply wild. Here’s one of the results of my setup, and one of my first attempts from a cold spell in February, 2016:
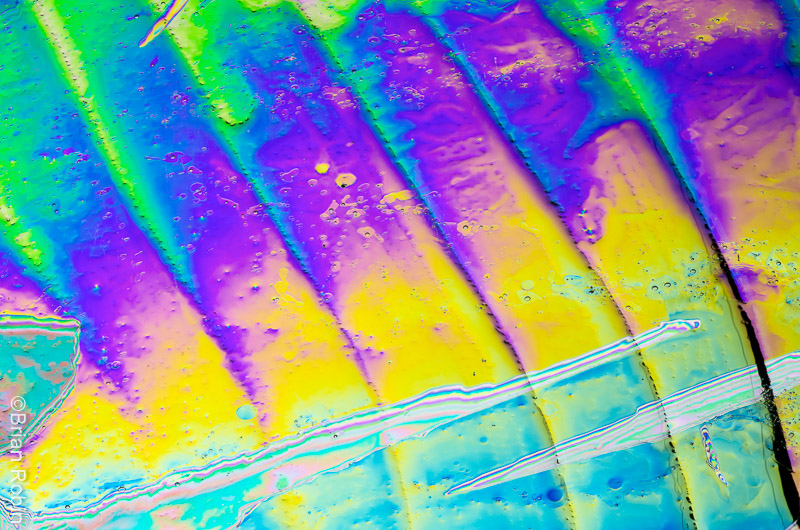
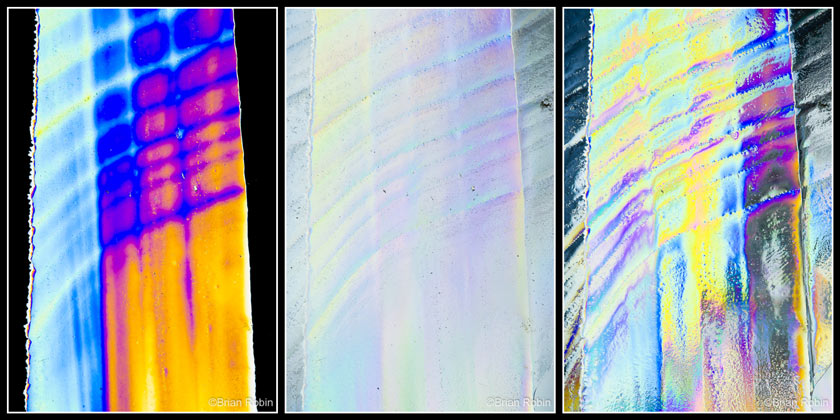
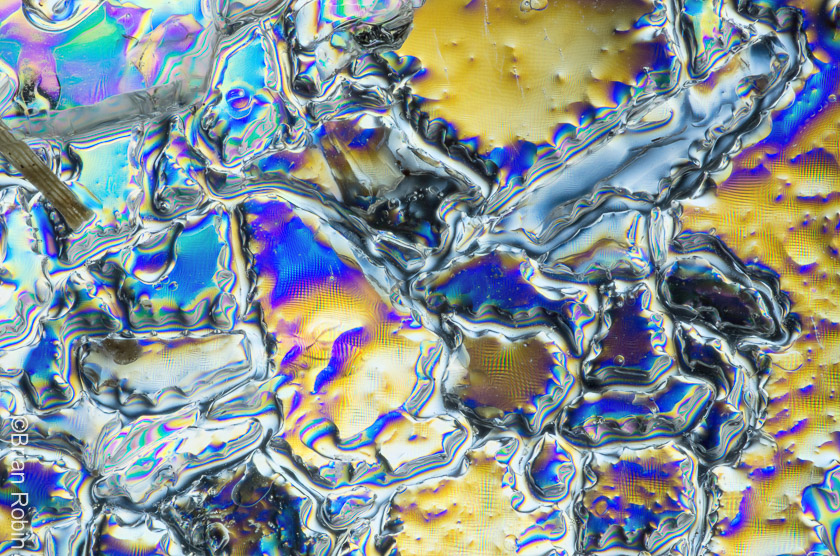
Various things will affect the colour, the thickness of the ice is a major factor, how the ice crystals actually formed, your angle to the ice, and the relative orientation of your polarizers. The last factor can be seen in this example, which is the same section of ice but the on-camera polarizer was rotated between photos:
Endless winter fun for the easily amused.
As you can imagine, this is endless fun during a cold Ontario winter. Find a piece of ice. Put it in my little polarized setup. Move stuff around until I find something interesting. Start snapping. Never ending joy from a wee chunk of frozen water!
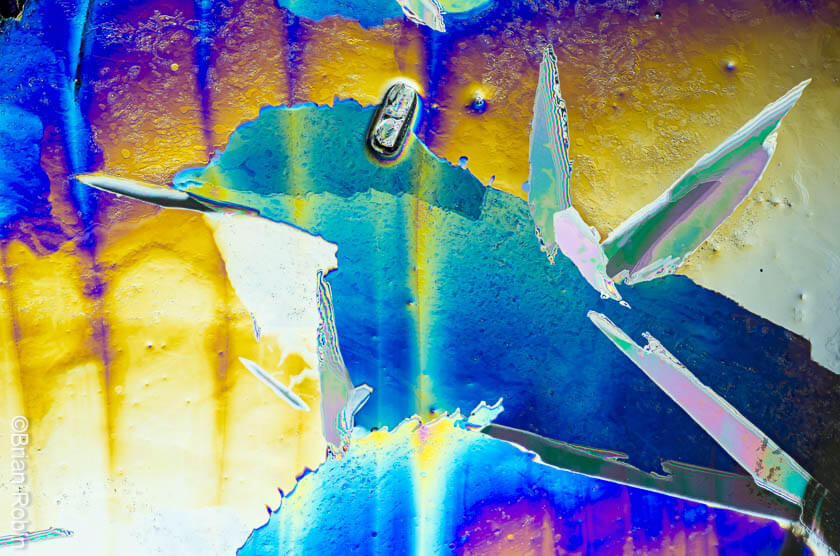
With ‘naturally formed’ river ice, I’ve found the most vibrant colours are often revealed with the ice at an angle to the camera, so if you try this at home, try tilting:
Birefringent ice images are largely abstract, but there are often hidden little scenes to be found. Birds, camels, people, or even entire mountain ranges. Perhaps the product of a cold-addled mind, but who knows? Who cares! Any endeavor that keeps you (reasonably) sane while staring at 5 foot snow drifts out your window is worthwhile!
Tiny bubbles are exciting.
There’s no wrong or right. I said to keep it cold, but let it partially melt, tiny bubbles in things can be exciting. Put the ice close to the lcd for a bit of texture. Try rotating the polarizers. Try thicker pieces of ice. Try making your own ice (that will be another post!). Try other birefringent materials – clear plastics are a good place to start, readily available and less melty.
Most importantly, have fun making your own images or just enjoy looking at mine!