After my initial foray into the Birefringence of River Ice early in 2016, it was fairly clear that the thicker parts of the ice end up…clear, and it’s the thinner parts that liven up between crossed polarizers.
Nature does a fine job of making thin ice on river edges or the tops of puddles with endless interesting shapes to explore, but why not ‘make’ some thin ice and see what happens?
As a bonus, being able to make some thin ice at home means you can photograph it in your pajamas and no trudging off in the cold to a river or a puddle in search of a suitable piece of frozen water. Laziness for the win!
There will be many approaches to ‘making’ thin ice. Here’s mine:
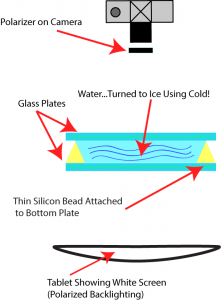
- Take two plates of glass, (mine are approximately 10cm by 15cm).
- Run a very small bead of silicone around the edge of one of the plates. Let this cure.
- Pour water on this plate
- Put the second piece of glass on top, use a spring clamp to squish them together to make a thin layer of water sandwiched between glass.
- Put someplace cold!
After it’s frozen, proceed as with any birefrigent material – put the ice between polarizers and backlight it. I use a polarizer on the camera and a tablet showing a white screen as my backlight (a basic LCD outputs polarized light, so think of it as a light source with a built in polarizer). Finally, enjoy the coloursplosion!
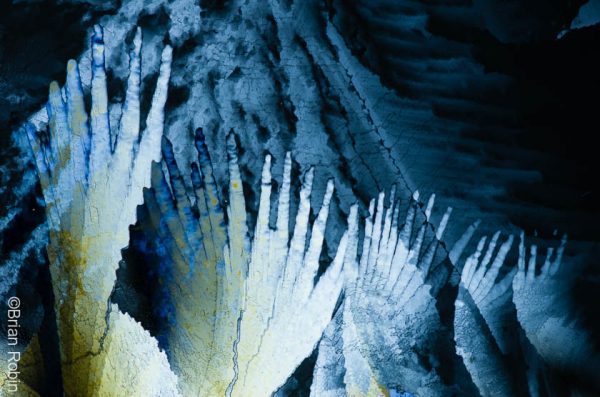
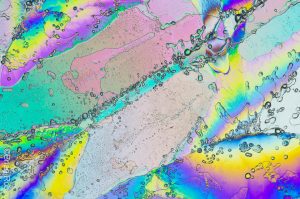
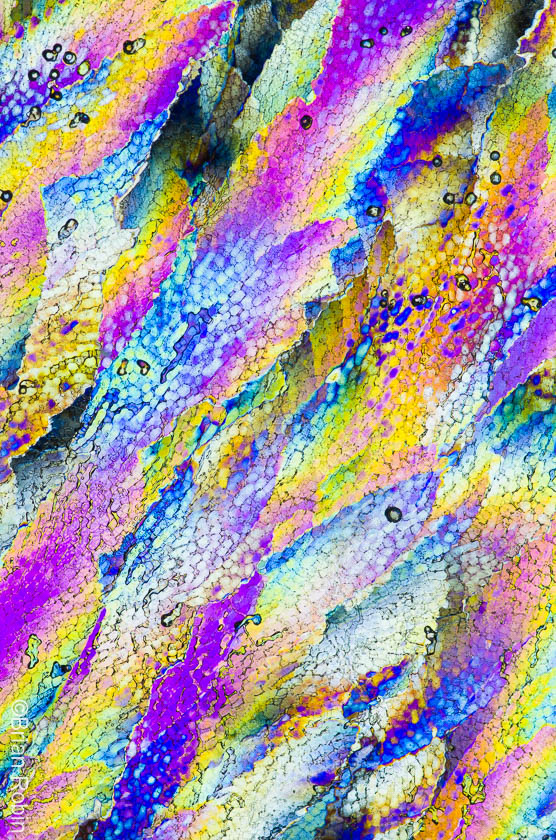
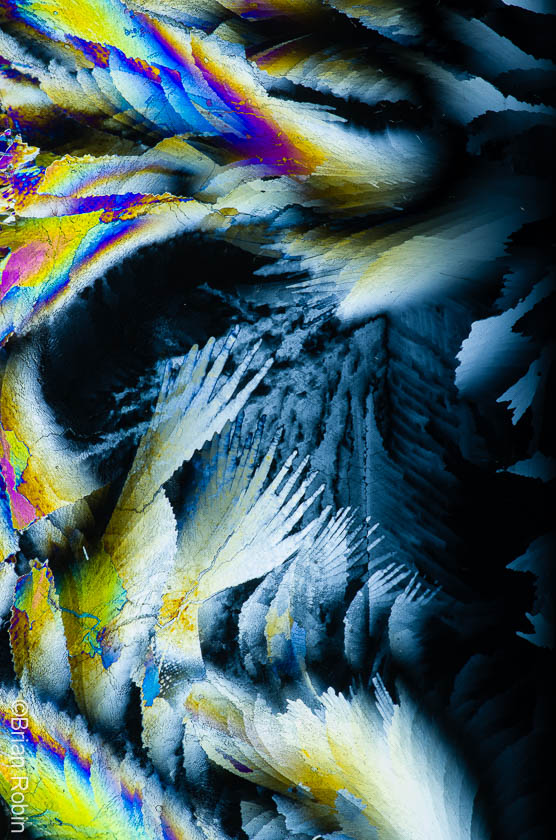
A birefringent material, such as ice, does spooky things to polarized light which can result in wacky colours.
If you’re better than me, you might be able to consistently remove the top layer of glass without breaking the ice up. I’m fumble fingers, so I just make sure the glass is nice and spotless before starting, and carefully clean the outside parts before photographing.
There are many variables affecting the results, but even the most basic approach will give you infinite variation and and endless supply of photographic subjects. Here are a few things you can mess with:
Temperature the ice forms at
You can perform this entire process in a basic freezer, but let’s put those -25C February evenings to good use for a bit of variety. I leave my glass & water sandwiches outside overnight – this not only makes use of our absurd natural weather, but gives me something besides coffee to look forward to in the morning. It’s like a never ending Christmas, but with the gift of colour instead of socks and underwear.
Thickness of the ice
I control this with my bead of silicone. I have one set of plates labelled “fat and sloppy” that tends to give results that are also “fat and sloppy”, the thickness of the silicone bead is equal to the thickness of one Canadian penny.
However, most of my more interesting results come from thinner ice. I’ve never measured how thin – immediately after laying down the silicone bead I would shape it with a stencil cut out of a credit card (I suggest using an expired one). You can easily experiment with different thicknesses – even by my standards, both glass and silicone are cheap.
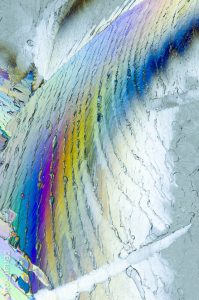
Here’s a thinner example:
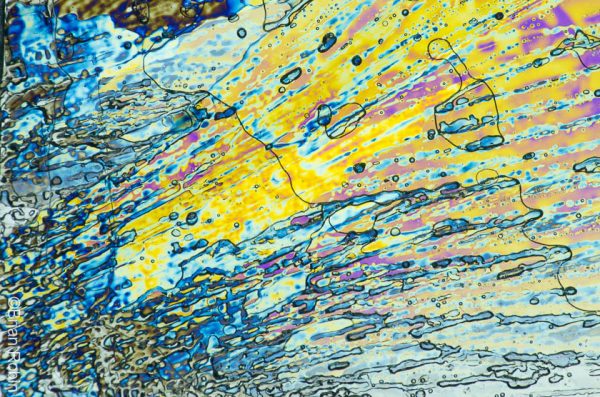
For a bit of variation across our frozen macro landscape, you can also try tapering the bead’s height down to no gap at one end of the plate. As the thickness approaches zero, you will lose colour but there are interesting shapes to be had. This next one was thicker on the left than the right (the plates of glass actually touched on the right):
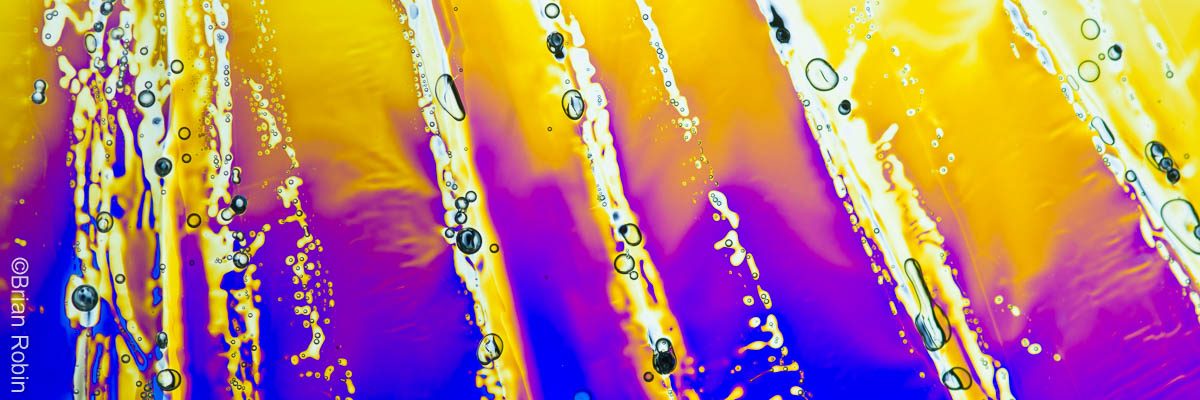
Air content of the water
Bubbles or no bubbles? Either way can be interesting. Boiling water and treating it gently will lower the air content as you make the plates. So will melting fresh clean snow directly onto the glass (we have an ample supply where I am in February!).
Or dump tap water straight on the glass for a mess of air bubbles:

Let ‘er melt…just a little
While I form most of my ice outside on the porch, if it’s still -25C when I get up, it can be challenging to precisely line up photographs while the tears of pain joy are causing my eyelids to freeze together.
I prefer to move my photography where it’s warmer, an unheated entryway, where it’s usually above -10C. This way I can last at least 15 minutes before my brain freezes.
If the entryway happens to be close to or above zero, the ice will start to lose its motivation to remain solid (the LCD screen I use for lighting also gives off heat!) and you’ll sometimes get neat lines that wobble about. Of course, this means your ice is on it’s way to becoming entirely run-of-the-mill liquid water, but that transition period can be pretty:
Not a photographer? No problem.
While I enjoy immortalizing ephemera in photographs, and I’m happy to say that ice is not permanent in southern Canada without human intervention, I confess to enjoying just staring at these little creations through the viewfinder.
While I enjoy immortalizing ephemera in photographs, it’s hard to beat a first hand view.
I’ve made it a habit of carrying around two polarizers scavenged from the lenses of “RealD 3D” movie glasses to sandwich pond ice between while on nature walks, just for the sake of looking at with no intention of photographing.
In a pinch, a pair of polarized sunglasses, a piece of thin ice from any source, and a bit of clear blue sky (or a smartphone screen!) can bring on the colour…it’s a fun bit of science magic for all ages!